
Step-by-Step Box Profile Installation: Critical Details in Drywall Partition Wall Construction.
Step-by-Step Box Profile Installation: Critical Details in Drywall Partition Wall Construction
In modern construction projects, partition wall systems are among the most important elements that increase the functionality of a space and add flexibility to the structure. The heart of these systems is undoubtedly the installation of box profiles and drywall profiles that form the load-bearing skeleton. The high-standard galvanized profiles we produce as HC Drywall Profile protect the static posture of structures while offering long-lasting use. Box profile installation serves as the main carrier of the drywall system, especially in areas with high ceilings or in cases where extra strength is required. In this guide, we will share methods that will guarantee the success of your project by meticulously examining every detail, from the installation stages of a partition wall to the tricks of the assembly.
Importance of Pre-Project Preparation and Correct Material Selection
Behind every successful installation lies flawless planning and correct material selection. Before starting the assembly, the floor, ceiling, and wall surfaces of the application area should be checked, and scale deviations should be detected. Choosing the profiles with the most suitable wall thickness for the load and height of the project from the HC Drywall Profile product range prevents the system from stretching in the future. Box profiles are generally preferred in door openings, wide spans, or wall sections that will carry heavy loads where the main carcass needs to be strengthened. During the preparation phase, cutting the profiles, determining the screw types to be used, and having insulation tapes ready are factors that directly affect the installation speed and quality.
Foundations of Error-Free Installation with Laser Meters and Marking
The position of the partition wall within the space must be flawless in terms of aesthetic and architectural integrity. In the marking process, which is the first technical step of the installation, the line to be followed by the wall must be clearly drawn on both the floor and the ceiling using a laser level or a chalk line. Measurements made with the help of a laser meter ensure the verticality of the box profiles and their parallelism to each other. The attention shown to this stage in the installation of our HC Drywall Profile branded products ensures that the surface looks smooth at the end of the wall and that the door frames fit perfectly. It should not be forgotten that even millimetric errors can lead to large deviations at the end of the wall, and the measurement process should be confirmed from several different points.
Use of Sound and Heat Insulation Tape in Fixing Bottom and Top Tracks
Using insulation tape at the points where box profiles or drywall U-tracks come into contact with the floor and ceiling is a must for a professional application. These tapes prevent vibrations in the structure from being transmitted to the wall, cutting sound bridges and increasing acoustic performance. This step, which we emphasize in the HC Drywall Profile installation manual, also prevents cracking caused by thermal expansion. When the track profiles are screwed to the ground, dowels and screws suitable for the structure of the ground should be selected, and the screwing intervals should not exceed 60 centimeters. This fixed line is the fundamental mainstay that prevents the entire system from moving.
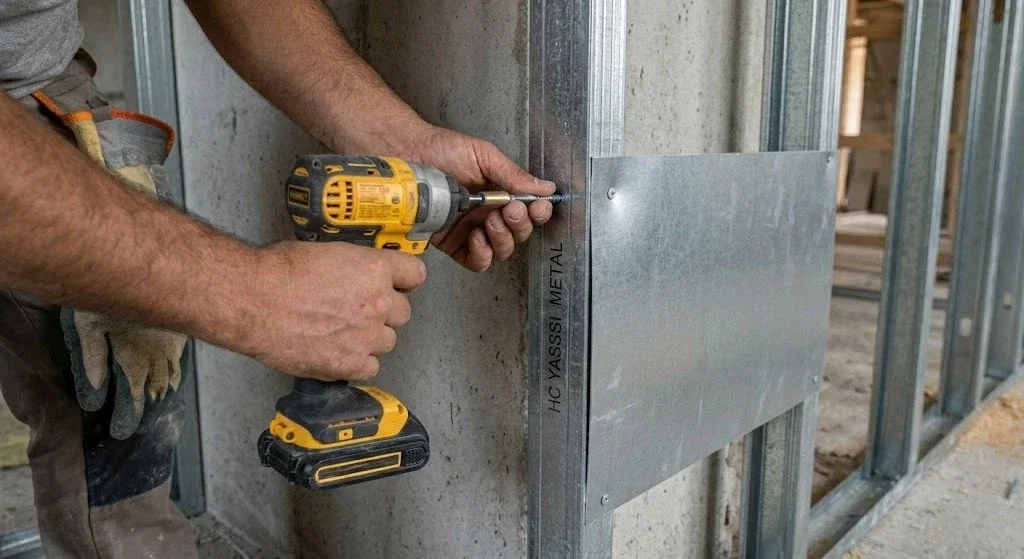
Integration of Box Profiles into the Carcass System as the Main Carrier
In some projects, standard galvanized profiles may not be sufficient; box profiles come into play especially in areas with dynamic loads such as door openings. Including box profiles in the carcass system maximizes the rigidity (non-bending) of the wall. When joining HC branded box profiles with U and C profiles, suitable self-drilling screws should be used for metal-to-metal connection. The fact that the box profiles are perfectly vertical is critical for the gypsum boards to be placed on them to sit fully on the surface. This integration ensures that the system successfully carries both vertical loads and lateral wind loads.
Arrangement of Vertical C-Studs and Calculation of Axial Spacing
The placement of vertical profiles (C-studs) is a strategic issue for the partition wall not to stretch and to be able to carry the loads to be hung on it. The axial spacing, which is generally determined as 60 centimeters, should be reduced to 40 centimeters on walls where ceramics will be laid or cabinets will be hung. The high-strength C-studs we produce as HC Drywall Profile are manufactured with millimetric tolerances so that they do not jam when placed inside the tracks. The fact that each of the profiles faces the same direction helps the screwing process to be healthier during the gypsum board installation. The vertical profiles should fully enter the track on the ceiling, but a gap of 1 centimeter should be left as an expansion allowance.
Support Profile Techniques in Creating Door and Window Openings
The areas where the most problems are experienced in partition walls are the door and window openings with moving parts. The vibration created by the door leaf while opening and closing can cause cracks in the corners above the door over time. To eliminate this risk, box profiles or reinforced HC profiles riveted to each other must be used on the door sides. While creating the horizontal headers above the door, supporting the C-profile by bending it from the sides ensures that the load is distributed to the main carcass. The box profile installation used in this area also creates a solid ground for screwing the door frame and prevents the door from sagging.
Passing Electrical and Mechanical Installation Cables Through the Profile
One of the biggest advantages of drywall partition walls is that they allow installation cables and pipes to be easily passed through the wall. The H-shaped holes or special gaps in HC Drywall Profile designs facilitate the work of installers. Plastic protectors can be used to prevent the sharp edges of the profiles from damaging the cable during cable pulling. Fastening elements should be preferred to prevent noise at the points where the installation contacts the profiles. If the installation is to be passed through the box profiles, appropriate holes should be opened without disturbing the static structure or the installation should be directed from the side of the profile.
Placing Sound and Heat Insulation Boards Inside the Carcass
After the installation of the carcass system is completed and the drywall on one side is screwed, insulation materials are placed in the inner cavity. Materials such as rock wool or glass wool should be in the form of boards and of a width that will fit perfectly into the profile intervals. In HC Drywall Profile systems, the concave structure of the vertical profiles provides support to prevent the insulation material from sliding down. Placing the insulation material so that there is no gap between the profiles both minimizes sound transition between rooms and acts as a protective shield in projects requiring fire resistance. A gap-free filling is the key to a comfortable interior.
Screwing Rules and Edge Clearances in Gypsum Board Installation
No matter how solid the skeleton system is, incorrect screwing of the gypsum boards can reduce the performance of the system. While the boards are being screwed to the vertical profiles, care should be taken that the screws come exactly to the center of the profile. HC Drywall Profile surfaces are optimized for the screw to enter easily and grip the metal tightly. The screws should not pierce the paper surface of the board, but they should not remain outside the surface either. The screwing process, usually done at 25 or 30 centimeter intervals, ensures the integration of the board with the profile. In addition, leaving a distance of about 1 centimeter between the floor and the board prevents the moisture that may come from the floor from passing to the board.
Strength-Enhancing Role of Horizontal Records and Corner Joints
In long and high walls, vertical profiles alone may not be enough; horizontal studs should be thrown at certain heights to increase the lateral strength of the wall. These horizontal parts can be created from box profile pieces or C-profile sections. In corner joints, at least three vertical profiles must be locked to each other at the point where two walls meet. HC Drywall Profile corner details should be constructed in a way that allows the drywall to be screwed securely from both directions. Solid corner joints allow the wall to flex against the movements of the building and prevent the formation of hairline cracks after painting.
Rust Prevention in Box Profile Welding and Connection Details
If you are using black sheet box profiles next to galvanized profiles in your project, it is vital to protect the points where welding is made against corrosion. Since the welding process burns the galvanized coating, these areas must be recoated with anti-rust paint or cold galvanized spray. Since HC Drywall Profile products are self-galvanized, the risk of corrosion in screwed connections is minimal. However, when box profile support is used, these protective measures should not be neglected to extend the life of the metal. In humid environments, corrosion can reduce the carrying capacity of the profile over time, endangering the safety of the system.
The Place of Thermal Expansion and Dilatation Joints in Assembly
In large-span buildings, expansion joints should be left at regular intervals to compensate for the movements within the structure itself. In partition wall installation, the profile line that continues uninterrupted approximately every 10-12 meters should be divided and a movable joint should be created. This technique used in HC Drywall Profile systems prevents stresses caused by the settling of the building or temperature differences from appearing as cracks in the middle of the wall. At dilatation points, the profiles are not screwed tightly to each other; on the contrary, they are left in a gap where they can move independently and covered with flexible profiles.
Site Inspection and Assembly Quality Control Checklist
When the installation process is completed, a quality control tour should be made before moving on to the plaster and paint stage. The checklist should include that all profiles are in balance, the screwing frequency is in accordance with the standards, reinforcements in door openings are made, and the safety of installation transitions is ensured. As HC Drywall Profile, we recommend that the applicators manually check the strength of the carcass at this stage and confirm whether there is any play. A solid carcass safely carries heavy decorative coatings or a simple painting process for many years.
Economic Life and Sustainability with HC Drywall Profile Assurance
A box profile and drywall installation made with the right steps and quality materials serves smoothly throughout the economic life of the structure. HC Drywall Profile adds a factor of trust to your projects, not just a construction material, with the advanced technology and high-quality raw materials it uses in the production phase. Wrong application or low-quality profile selection may seem cheap in the short term but becomes more costly with renovation expenses in the long term. For a sustainable architecture, working with profiles that comply with standards, whose thickness has been tested, and whose galvanizing quality has been approved is the first rule of building the safe structures of the future.